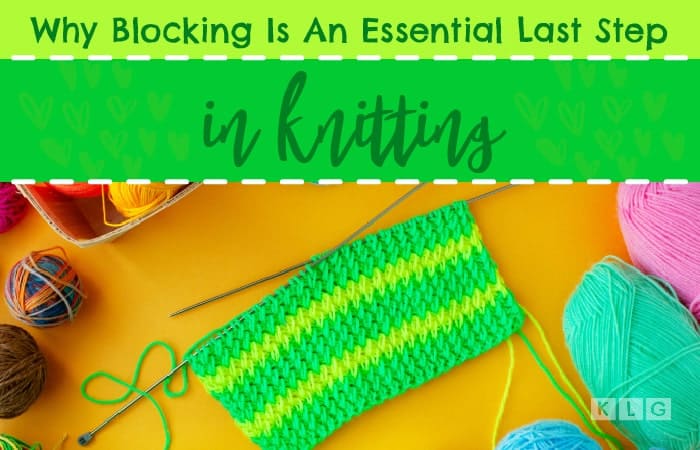
With the effort you put into knitting, you want your finished item to look fabulous. That’s where blocking knitting comes in. Learning to block your knits is essential. With the transformation, you’ll experience a wow factor!
Great! One last step. Check your inbox for a confirmation email.
I reviewed, fact checked and updated this post on March 26, 2023.
Table Of Contents
What Is Blocking In Knitting Terms?
In knitting, the blocking process is wetting/soaking or steaming your finished garments. This sets their shape by being stretched out.
The process of blocking knits, evens and increases the level of drape. It can be used on lacework, sweaters, hats, scarves, mittens, a baby blanket, and socks. I highly recommend blocking finished projects. It gives the item a professional look.
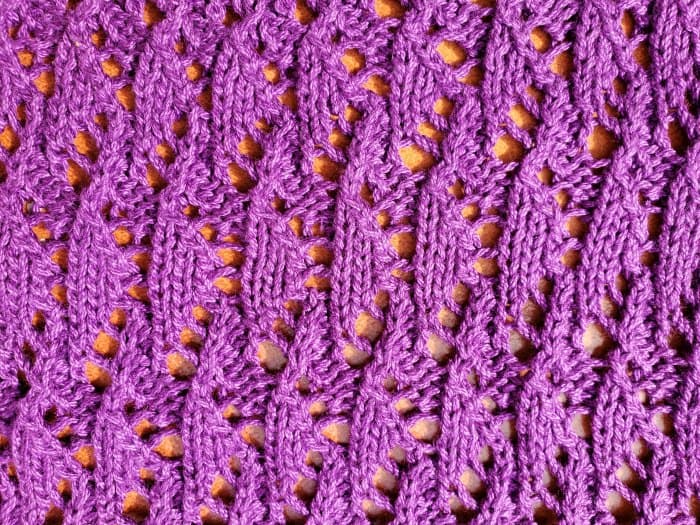
It also showcases the stitches and pattern repeats particularly in lace and cable designs. Wondering how to block arm weaving? See my guide. Blocking can only be applied to natural fibers. There’s a technique for synthetic fibers called ‘Killing’.
Doing this adds more drape to a knitted acrylic fabric.
Blocking is used before sewing knitted pieces together. When you’ve finished sewing everything together, you can steam block the side seams for a lovely finish. Some knitters prefer to block after they’ve finished their garment.
Knitting tools like a yarn baller make life easier.
Materials & Equipment
Necessary blocking tools are a sink or clean bucket, rust proof T-Pins, and towels. Don’t use white fluffy bath towels. Use older clean towels instead. I blocked my knitted pieces using sewing pins on old towels.
Some suggest using a large garbage bag, as it doesn’t absorb water.
Want good-quality yarn bowls for knitting? Read my guide.
Blocking Mats/ Boards
A blocking mat is great. Some have grid markings to help you measure your knitting. Blocking mats are foamy material, easy to pin into. Most are made from foam tiles that fit together to make a complete board.
Blocking boards are usually wood and are great for knitted squares and hexagonal pieces. No Blocking Mat? No Problem! If you don’t have a blocking mat stored somewhere in your secret yarn stash, don’t panic. You can use any flat surface!
Tip 1 – Use The Right Surface For The Right Garment – A table laid with towels or a kitchen bench is great for garments that can be put into place by hand. If you’re trying to block a lace knitting project, pin it out on a foam board, cushioned with towels.
Tip 2 – Don’t Use A Surface You Use In Everyday Life. Your knitting has to dry for a while. Put your knitting somewhere out of the way. The surface gets damp, don’t use a surface that will mark with moisture.
Tools for knitting that make your life easier.
Stainless Steel Blocking Wires
These wires straighten out edges of shawls. There are also flexible ones for knitting, great for curves on shawls. These aren’t essential but useful.
An alternative for straight edges is the String Method. A long length of smooth scrap yarn threaded through a darning needle and the yarn is threaded along the edges. TIP: The first time you use them, wipe them to remove manufacturing residue.
Here are ideas for gifts for knitters who have everything.
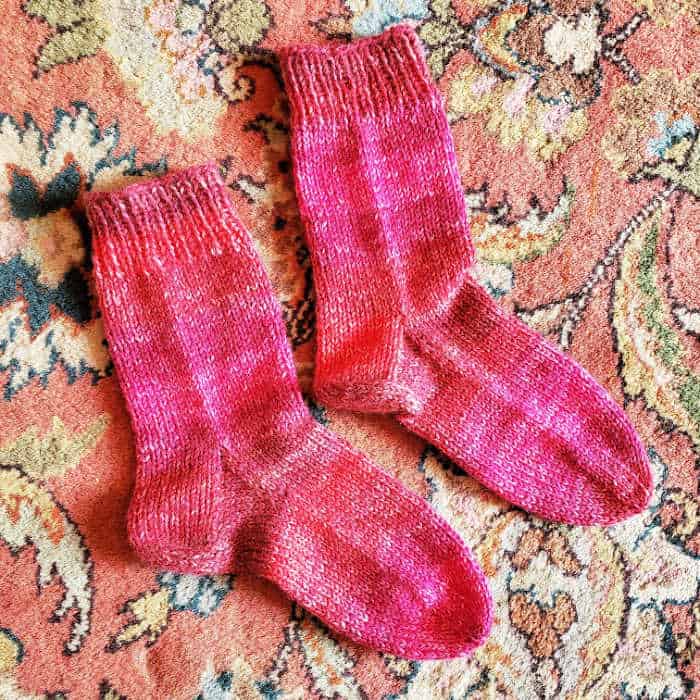
Sock Blockers
Sock blockers are handy tools! They leave your socks stretched out, no pins needed! Talented crafters make beautiful sock blockers.
T-Pins To Stretch Out Stitches
If you’re trying to block a garment, the best pins are T-pins. Sewing pins work, ensure they’re rust-free.
Like yarn used for arm knitting? See my review of the best.
Wool Wash
Wool Wash keeps your knit squeaky clean! If you don’t have wool wash, use mild baby shampoo or delicate dish soap. Rinse with clean water once or twice.
How To Block Knitting For Each Method
The three main techniques are wet blocking, steam blocking, and spray blocking.

Wet Blocking – The Magic Of Moisture
This blocking method is washing the knitted item by immersing it in water and letting it soak to relax the fibers. Also known as Immersion Blocking. Check the yarn label for care instructions before beginning.
Reasons Why Wet Blocking Is The Preferred Method Of Many Knitters
- Giving yarn a wash rinses away any residue.
- If using a dyed yarn, sometimes there’s excess dye. Soaking your knitting helps the fiber release the extra dye.
- A garment hangs nicely on the body.
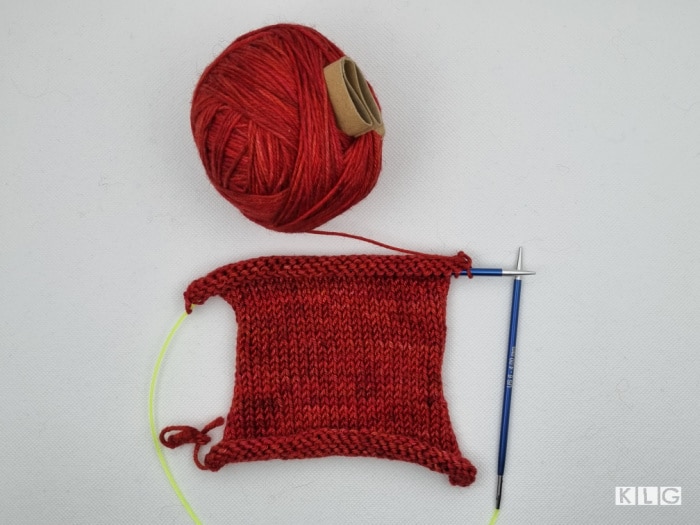
- Get the right fit! In most patterns, particularly sweaters, the intended fit happens after you block. That’s why gauge swatches are meant to be blocked as well. It shows you how the garment behaves after you’ve blocked it.
Step 1
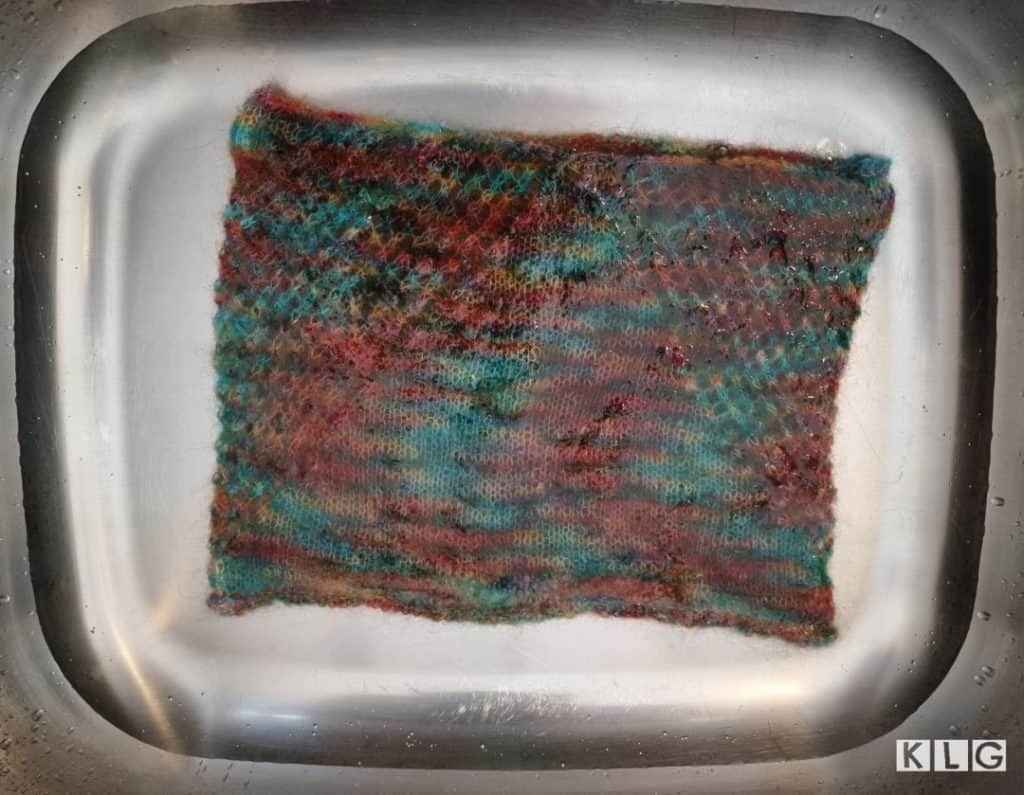
- Fill a sink or bucket with lukewarm water.
- Squirt some Wool Wash or baby shampoo into a sink/bucket.
- Give it a good mix.
- Place it in the sink/bucket, making sure it’s nice and wet.
- Leave it while it soaks, don’t dunk it.
- Let it soak for 10-30 mins depending on the fiber you’ve used.
Step 2
- Grab a older towel from your cupboard.
- Lay it out on a chosen surface.
- If you’re using a blocking mat, you may want to interlock more than one, depending on the size of your piece.
Step 3
- Return to the sink/bucket
- Drain away the water
- Gently squeeze your item (don’t wring!)
- Place in a soft dry towel
- Roll the towel to get any extra moisture out of your work.
- Stomping on the rolled up towel removes extra water
Step 4
- Lay your knitted pieces on the blocking mat/towel
- Stretch out to the desired length and width.
- Grab t-pins (or rust proof sewing pins)
- Pin every few inches around the perimeter.
- Ensure your knitted pieces are pinned or placed in the desired way.
- Leave your knit to dry. This can take up to 1-2 days.
Pin Now to Save for Later
Misting Or Spray Blocking
Misting is an excellent option if you’re a beginner or unsure how it’ll turn out.
- Step 1: Lay your newly finished knitted piece onto a soft towel. Put the towel on a surface suggested above.
- Step 2: Grab a clean mist bottle, and lightly mist your work.
- Step 3: When slightly damp, gently pull your knit into the finished/desired measurements.
If your knit isn’t staying, pin it out on a board.
Steam Blocking
This technique is a gentle method that doesn’t require you to soak your knit. You only need a steam iron, T-Pins, and mats.
- Step 1: Place your knitted piece on the mat and pin it using T-Pins.
- Step 2: Use the hottest setting for the steam function on your iron, go over the knitted piece WITHOUT pressing down. That’s really important!
- Step 3: After steaming, flatten it. If you used stockinette stitch, pin it to the board so your purl rows are facing up. This helps stop the ends curling.
- Step 4: Let the pieces cool down and you’re ready to sew.
FAQs About Blocking
Do I Have To Block My Knitting?
You don’t have to block your knitting. If there’s no adjustment or finishing that needs to be done, don’t bother.
Reasons To Block Your Knitting
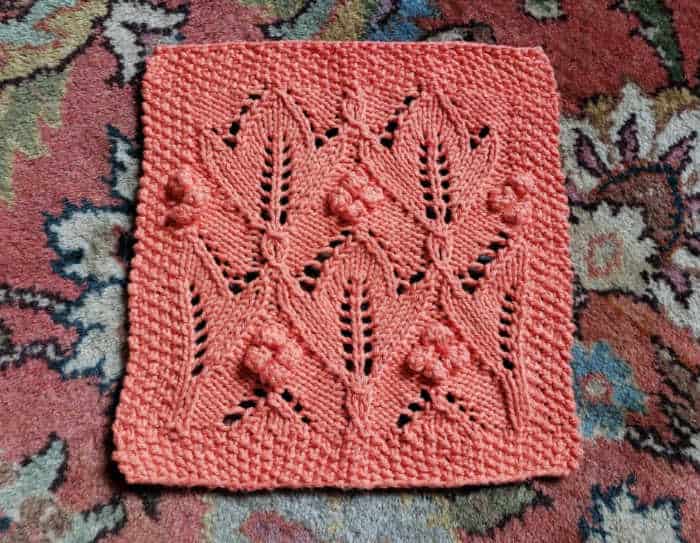
- It straightens stitches and evens the tension in your knitting. It defines intricate knitting patterns, relaxes the pattern, and dries it evenly.
- When working a lace pattern it’s important to block to open up the design.
- A good soaking washes excess dye from the yarn.
- It improves your knitting by creating a smooth, flat look. Knitting projects get crumpled or wrinkled when we’re working on them!
- If you have pets a good soak will remove unwanted hair. Be aware pets seemed are very attracted to knitting when it’s being blocked.
Blocking Tips For Different Fibers
- Natural fibers like wool & alpaca benefit most from full wash blocking
- For delicate items like angora, cashmere, mohair and wool blends and acrylic and synthetics, knitters recommend spritz/spray blocking. (This is like the washing method, but you spritz the fabric with a spray bottle than soaking completely.)
- Don’t block yarns like lurex (a metallic yarn) or novelty yarns.
- Most yarns spring back when you pull them. Over-blocking makes the yarn lose it’s bounce. This causes too much drape and flattens out textured stitches like cables. Go gently and carefully.
- Steam blocking is an alternative method using heat and moisture. Never use a heat method on silk, too delicate. This method is good for cotton and linen.
Pinning Basics
On a flat surface, a mat is ideal. Pin the knitted items, placing the pins at an angle, with the top of the pin pointing away.
Place the first in the top center, moving to the bottom center as you pin the knitted piece to the correct length. Pin your work to the correct width (for a sweater, start with the bust width). Always refer to your finished measurements.
How Do I Block Acrylic Yarn?
Spray block acrylic yarn. If you want to change the drape of your acrylic garment use the “Killing” method. ‘Killing’ is when you steam block acrylic yarn. Once you’ve ‘killed’ something, you can’t restore it to it’s original shape.
How Do You Block A Knitted Sweater?
Follow the wet blocking steps. The only difference is you block the whole sweater.
TIP: Sew in your ends after you block a sweater. You don’t want the ends to wriggle out when the fabric changes.
You’ll need more than 1 towel to remove leftover water. Pin out on the mats to the desired length and width. Sometimes your knitted sweater may need ‘aggressive’ blocking. This is when you want to open up a lace/cable design.
In addition to pinning, wires are placed on either side of the sleeves and on either side of the body. If your piece is too ‘skinny’ or short, stretch the piece, and you can coax it into a better fit! It won’t work miracles but knit fabric is flexible.
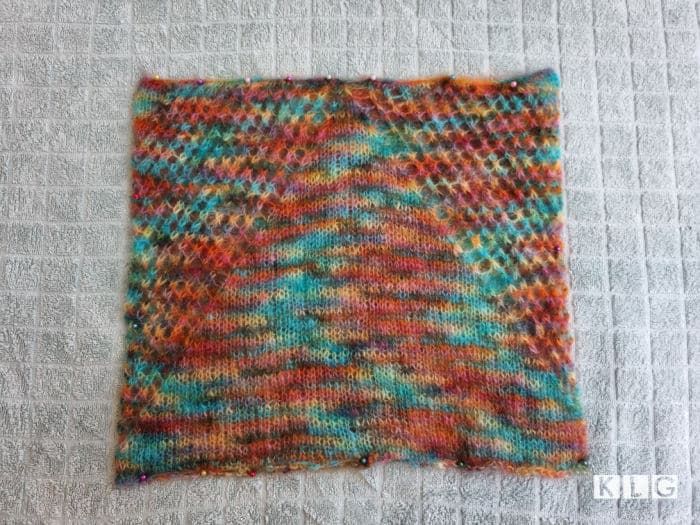
How To Block A Knitted Shawl

A knitted shawl often looks all crumpled and the design isn’t defined. Wet blocking opens up patterns, smooths out and relaxes the yarn.
Letting stitches shine in all their glory! Set aside an hour or so to block a shawl. Well worth it! Mats are helpful for pinning your shawl as they can be made into different shapes. Depending on how big your shawl is, 2 sets may be required.
Step 1
- After binding off, sew in your ends.
- Soak your shawl in lukewarm water in a bucket or laundry sink for 15-20 mins. Adding a no rinse detergent like Soak is a good idea.
Step 2
- Once soaked, remove from water and press out as much water as you can with your hands. Pressing it against the side of the bucket or sink will get a good lot of water out.
- Place on a dry towel and gently roll up. Don’t wring it out. Rather stomp on the towel with clean feet to remove excess water. You many need more than 1 dry towel.
Step 3
- Lay your shawl out on your surface. Mats are great but if you don’t have these a dry towel, clean carpet or a bed will do.
Step 4
- Block with pins and/or wires. Wires are fabulous for the straight edges and spine of your shawl.
- If using a triangular shawl, pin the spine first and carefully place around the edges.
- Once the corners are pinned, assess whether the shawl is stretched enough. If not, pull it a bit further in each direction for a better look.
- Pin out the scalloped edges if your design has these. It’ll be obvious from your shawl design which points need to be pulled out and pinned.
- If unsure look back to the image of the finished pattern.
- If you want to spray block, use a spray bottle to slowly wet it once pinned into place.
Step 5
- Leave your shawl to fully dry. If you remove pins too early and the shawl is not 100% dry, all your hard work won’t turn out well.
- Remember during the drying process, fibers shrink and pull together, more and more tension will be put on the pins. As your shawl dries, continue to check it to see if any pins have popped out and need to be reinserted.
- When completely dry, remove the pins and celebrate your hard work.
How To Block A Large Knitted Blanket
Set aside at least a couple of hours. Weather is a factor. If you live in a place with dry sunny days, these are perfect for a large blanket outside on a big sheet. If outside drying isn’t possible, you’ll need a big space and a fan to help it dry.
You follow the same method of wet blocking. After soaking, squeezing out excess water. Use flexible wires and start threading them through the edges.
Layout your blanket on your desired surface and start pinning the corners. Use a tape measure to check all sides are smoothed to the right dimensions. Stick a pin the blanket’s center. Measure until you find the longest distance from pin to side.
Make sure all distances have the same measurement and the corners are 90 degrees. Keep smoothing and stretching out gently, pinning the edges until everything looks and measures out correctly.
Leave until absolutely dry. Remove the pins and celebrate!
How To Block a Hat
Block hats over the underside of a bowl. Balance the upturned bowl over a cylindrical object to support the bowl. Stand on a flat surface.
How To Block A Scarf
Steam blocking works beautifully for scarves if the stitch definition is not complicated. Pin out your scarf or use wires so the edges are straight and the overall fabric is smoothed out. Follow the instructions to steam block.
If your scarf design has intricate lace or cables, wet blocking is better to show off the amazing stitch definition and open up the lace design.
Conclusion
Now you’re more familiar with how to block knitting, it’s worth seeing which technique works best for you. You’ll have a wonderful finished piece at the end.

I have an infinity scarf to block….it’s ribbed and I’m supposed to open it up an inch or two…am I going to regret it if I don’t use wires, I’ve never blocked anything this big before. I do have the interlocking mats to get the size correct.
Hi Kathy. Most knitters recommend blocking wires for beautiful straight edges. I imagine you have put a great deal of time and effort into your infinity scarf. I think you’ve really already answered your own question, blocking it with wires will give it that extra special finish. Great that you already have the mats. Blocking is a time consuming process to be sure but so worth it. If you would be happy to share a pic with my readers, we’d all love to see your scarf before and after you’ve finished blocking. Get in touch with me here.
Thanks for responding. I haven’t quite finished the scarf, so can get some wires ordered, will look at your recommendations. I’m the person that always pays someone at a LYS to finish a big project for me, but that’s not an option for me now, and I’m telling myself it will be good for me, LOL.
What a wonderful service you’ve got on to at your LYS! In these times I know that’s not possible. Keep thinking to yourself how good you will feel at the completion of all your hard work 🙂
Can I block malabrigo rios hat to make a little smaller? How?
Hi Tippy. Unfortunately blocking does not help make something smaller. Perhaps you could try using threading elastic in the band of the hat.
What a great comprehensive article. Thanks. I notice you mention using rust proof pins. But the featured product is rust resistant. In time, the surface of rust resistant pins will deteriorate. You should buy new pins before blocking light or white knitting. I know this from sad experience. I am also trying out some very thin enamelled pins that are used for pinning butterflies. Of course it will take some time to discover how well these last. ANd I’m working with lightweight objects so that may also be a fcactor in pin choice. In any event I threw away the old pins and ordered a different product that claims rust proof rather than rust resistant.
Hi Mary. Thanks so much for taking the time to share your experiences with blocking pins. Your information is very helpful. I hope the enamelled pins last for a while. Would you mind sharing the product name of the pins you purchased that claim to be rust proof? I would appreciate it. Cheers Jodie
I have finished knitting a wool shawl which took me forever. It came out huge!!! I’m so disappointed and considering unraveling it and using the yarn for other projects. But is there hope to shrink it if I block it?
Oh no Mary! I’m sorry to hear that you are disappointed with how your wool shawl turned out. It’s so hard to experience this after knitting a project for such a long time. I’m reluctant to advise shrinking it by putting it in hot water and then blocking it. Only because I’d be upset for you if you didn’t like the overall result. If you have left over wool from this project, knit up a swatch and then test the shrinking using hot water. Then see what sort of results you get. Cheers Jodie