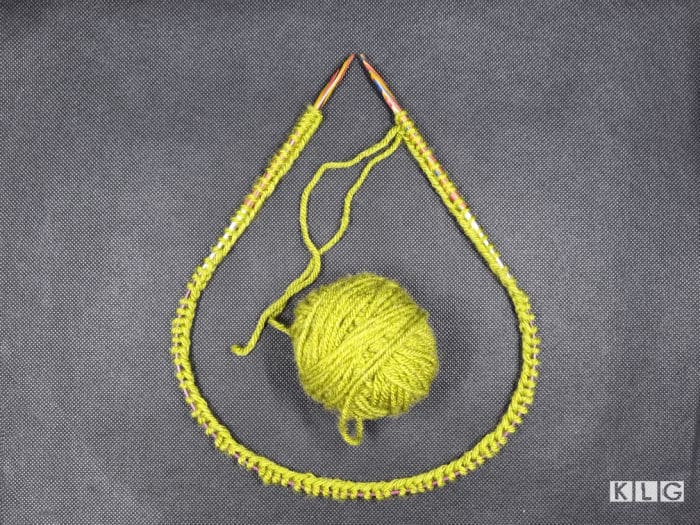
Joining in the round is essential if you want to start circular knitting. It joins one end of your cast-on stitches to the other end of stitches, forming a circle. If done correctly, the join isn’t noticeable once you weave in the tail end into the inside of the work. Here’s how to join for working in the round.
Suppose you don’t know how you’re in good company. Why learn from hard-to-find books when you can read my articles? Get ready to start knitting and advance your knitting skills with a new project.
I reviewed, fact checked and updated this post on May 28, 2023.
Table Of Contents
- What Does Join Knitting in the Round Mean?
- How To Knit Join In The Round
- How to Knit In the Round With Circular Needles
- FAQS
What Does Join Knitting In The Round Mean?
Once you finish casting on your required stitches onto your circular needles, you need a way to join the stitches so you can knit around and around. There are a few ways to join the round.
How To Join Knitting In The Round
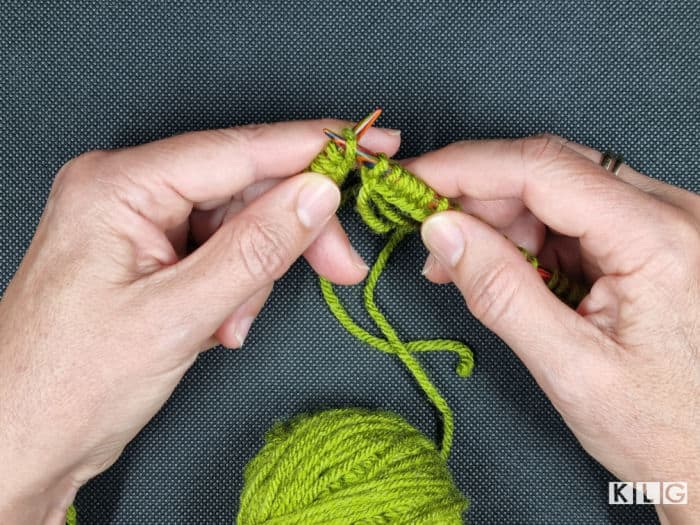
Make sure none of the stitches are twisted! This is an important step. How do you check? By ensuring the cast on ridge is around the inside. If part of it isn’t, untwist it. You don’t want the problem of the stitches in your projects facing in the wrong direction. This simple check makes all the difference.
Note: Don’t join in the round when swatching.
1 – Preparing
- Ensure the needle tip with the working yarn is on the right of the right needle
- (Left if you are left-handed)
- Push the stitches up towards the needle tips, and as you knit around, they’ll gather in a particular spot
- Move them around evenly to your left-hand needle to make it to knit them
- Mark the end using a stitch marker, this is just after your last cast on stitch.
Step 2 – Joining
Right-Handed Instructions
- Do 1 knit stitch (This is knitting the first cast on stitch)
- Pull the yarn firmly
- Continue on knitting the pattern with the next row
- The last stitch is just before the marker.
- Knit the last stitch
- Slip the marker over to the right-hand needle (this tells you it is the beginning of the round.
- Continue knitting
Left-Handed Instructions
- Knit 1
- Pull the yarn tight.
- Continue your pattern.
- When you get to the end, where your marker is
- slip the marker over to the right-hand needle
- Continue knitting
How To Knit An Invisible Join
Instead of knitting the first stitch, add an extra stitch.

Step 1 – Cast On
- Make a slip knot
- Cast on the required stitches in your usual way
- (Doesn’t matter how you do your cast ons)
- Cast on an extra stitch
- Work with the yarn behind the needle tips if you’re knitting
- In front of the needles if you’re purling
Step 2 – Slip It!
Right-handed
- Hold the needle with the yarn in your right hand
- Insert your right needle into the first cast on stitch on the left needle
- Take it right to left
- Slip the stitch onto your right needle.

Left-handed
- Hold the needle with the yarn in your left hand
- Insert your left needle into the first stitch on the right needle left to right
- Slip the stitch onto your left needle
Step 3 – “Bind Off“

Right-handed
- Insert the left needle from left to right into the stitch with the yarn attached. (The extra stitch)
- Bring the stitch over the slipped stitch on the right needle and off
Left-handed
- Insert the right needle from right to left into the stitch with the yarn attached
- Bring the stitch over the slipped stitch on the left needle and off.
Step 4 – Slip It Back

- Right-handed: Insert the left needle from left to right into the first stitch on the right needle. Slip it over to the left needle.
- Left-handed: Insert the right needle from right to left into the first stitch on the left needle. Slip it over to the right needle.
- Tighten the yarn and the yarn tail end until there are no loopy stitches between the knitting needles.
- I knit that stitch holding the tail and the yarn together and then pull tight. It makes a thicker stitch but it isn’t noticeable once you continue.

I place a marker at the beginning of the round and then work that stitch I’d slipped back to the left hand needle.


You can see the first stitch is thicker having been worked with the tail and the yarn. For every other stitch continue just with the yarn. Here’s some information in a video tutorial by Knitiversity.
How To Knit In The Round With Circular Needles
Knitting in the round is fun and a great skill to have. Make hats, gloves, socks, and all sorts using circular needles. For more on knitting in the round, read my complete guide. For info on types of circulars, see here.
FAQS About How To Join In The Round
How Do You Join Knitting In The Round Without A Gap?
1 – Use A DPN
Use a double-pointed needle to close the pesky gap
- Slip the first of your right needle onto the double point needle
- Do the same for the first stitch on the left needle
- Push the stitches on the double-pointed needle together
Step 2 – Flip It!
- Turn the double-pointed needle around
- The stitch on the left is on the right
- The stitch on the right is on the left
Step 3 – Gap-Free
- Slip the left stitch onto the left needle
- Slip the right stitch onto the right needle
- Tighten those ends! This technique makes it neat.
Note: As you knit more rounds, you may notice a small notch between the first and last stitches on the bottom. Weave the tail in.
How Do You Join The Round On Double Pointed Needles?
Step 1 – Cast On And Divide
- Cast on all of your stitches on one DPN
- Divide them between the number of needles you want to use
Step 2
Right-handed
- Hold the needle with the yarn on the right
- The needle to the left of the needle with the yarn is where you join
- Pull both needles down, so the stitches are close to the tips
- Slip the stitch on the left needle purlwise onto the right needle with the right needle.
- Insert the left needle into the second stitch on the right needle
- Lift it over the slipped stitch, but keep it on your left needle
Left-handed
- Hold the needle with the yarn on the left
- The needle to the right of the needle with the yarn is where you join
- Pull both needles down, so the stitches are close to the tips.
- Slip the stitch on the right needle purlwise onto the left needle with the left needle
- Insert the right needle into the second stitch on the left needle
- Lift it over the slipped stitch, and keep it on your right needle.
Pull the yarn and the tail end to make it neater.
Pin Now to Save for Later

How Do I Join The Round In The Magic Loop?
This method is seamless and you don’t have the problem of a noticeable gap.
Step 1 – Cast On And Set Up The Magic Loop
- Cast on the number of stitches for your project onto your circular needles.
- (Use any of the methods)
- Cast on one extra stitch.
- Push the stitches down to the middle of the cord
- Find the halfway mark between the stitches
- Add 1
- Pinch the cord and pull it out at the halfway point
- Slide both sides up to the needle tips
Example: You need 20 stitches on each needle. So cast on 40 and add an extra stitch, making 41. Count 20, add one and pinch the cord out.
Ensure the stitches aren’t twisted.
Step 2 – Join The Magic Loop
- The needle with the yarn is needle 2 (the one closest to you, with the needle tips pointing to the left)
- The other is needle one
- Take the first stitch on the back needle (needle 1) onto needle 2 (closest to you)
- Use your fingers or an extra needle to do this.
- Take the first stitch on needle two (not the one you just moved) over the stitch you just moved from needle one
- Move it over and off. You made a decrease.
- You added an extra stitch so you don’t lose your original stitch count
- Turn your needles around so the yarn is on the back needle. Needle tips are pointing to the right. You’re ready to knit!
Here’s a video tutorial by Emily from Blue Mouse Knits.
How To Join The Round After Knitting Flat
Knit flat, transfer to double points, and knit in the round. The only inconvenience is seaming the split edge after finishing your project. It works best for small things, like socks, a hat, or baby items. Here’s a video explaining how.
How Do You Add A New Ball Of Yarn In Circular Knitting?
The last stitch of the old ball and the first stitch of the new ball is knit as one. Together, knit a stitch and drop the old ball. This prevents holes. Here’s a great tutorial by B.Hooked.
Conclusion
Have a question about joining stitches in circular knitting? Tell me in the comments. I hope you’re content with your new knowledge and you knit a successful join. Happy circular knitting! There are many patterns to choose from.
Read Next: Splurge on some deluxe needles for you (or someone you hold dear) with my tips here.

How to make the ridges match up when knitting garter stitch in the round (knit to beginning of round marker, purl to beginning round marker)?
Hi Erin. You need to knit the first round after a long tail cast on, then purl the next round and alternate between knit and purl rows. To knit a jogless garter stitch in the round you need to slip the first stitch of every round. Cheers Jodie
Thank you for very clear instructions how to join on circular needles.
You’ve cleared up joining in the round for me once and for all! Thanks! The cast-off technique is the one I’ll use from now on.
Great to know that my post has been helpful! Happy Knitting! Cheers Jodie